A few months ago, I came across a blog by Byron Davis, a chorus teacher from Knoxville, TN, on how to use your Smartboard to take attendance using an excel file. I downloaded the file, adapted it to my class, and began using it in my classroom the very next day. This file allows students to “tap in” next to their name on the Smartboard as they enter the room. After downloading the file, you’ll need to follow these steps to adapt this file for your own classes:
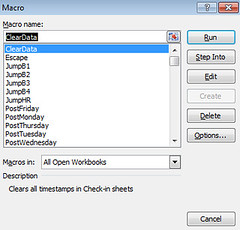
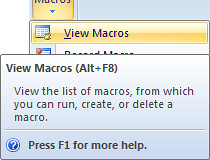
5. The Macro list pop-up menu should be visible now, Click on “Edit”. It doesn’t matter which Macro you choose to edit. This is just to get you into the Macro Editor.


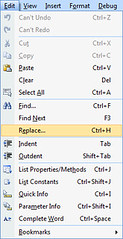
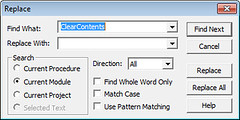
7. In the Replace dialog box
a. In the “Find What” field, type in the first tab name from the original. (See #1)
b. In the “Replace With” field, type the name that your want for your tab.
c. Under “Search”, be sure to choose “Current Project”
d. Click “Replace All”
8. In the Macro Editor Menu, choose File | Save
9. In the Macro Editor Menu, choose File | Close and return to Microsoft Excel
10. Rename each class hour tab with its new name.
11. Be sure to save when you are finished.
Comment
© 2025 Created by Steve Hargadon.
Powered by
![]()


You need to be a member of Classroom 2.0 to add comments!
Join Classroom 2.0